Sunday, September 20, 2009

Drawers Ain’t Easy!

100_0266

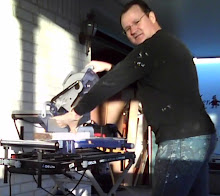
My 30th anniversary was awesome, the photo says it all. Donna and I have been blessed with a marriage that has sustain despite the secular world’s wisdom. We have two great kids and a wonderful grandson. Of course all these blessings has nothing to do with our actions but those of our Lord.

This weekend I began working on the workbench drawers. Drawers aren’t easy so I took a yet another simple design out of one of my wood magazines, one that is strong but not fancy. I haven’t purchased a dado yet so I have been using my router and my Kreg Jig R3, a awesome combination.  IMG_0008In the photo I build the front of the drawers with a frame and panel design. I use .75in x 1.5in red oak to build the frame and the panel is plain .25in oak. Building and install 8 draws took me about 6 hours. Your cuts have to be close to perfect and alignments right on or nothing slides the way it is suppose too.  I have a sense of satisfaction when it is all completed. More importantly than that I’ve added to my cabinet making skills. I built 4 shallow and 4 deep drawers for future options.

IMG_0009

The next phase is to work on the doors. If you notice I did not put a center bar. This allows me a wider opening to put larger kits inside.

Sunday, September 6, 2009

Work Bench Cabinets

 Cabinets Assembled

My skills at building quality cabinets isn’t where it should be. I intentionally decided to build real cabinets under and above my workbench. My workbenches of the past have always been 2x4s with open shelves. I took some simple plans I found in my Wood magazine and of course like we all do adjusted them to fit my requirements. Each cabinet is 33 inches long and 23 inches deep with two draws and two doors. I used 3/4 inch birch plywood for the sides and oak 1.5x.75 to frame the front. Since I preinstalled the dust collection hoses on the floor, I had to cut a 4 inch square at the bottom back to give it proper clearance.

2 MDF for Bench Top

As you can see by this picture I have spaced my 4 33 inch cabinets out with 3 12 inch openings. This will serve two purposes. 1) Allows me to have a workbench 13 feet long. 2) I can now create 3 full size pull outs that will hold hardware and consumables. You can also see the dust collection hose coming to the top of bench.

The bench is 1.5 inches thick, I did this by gluing to 3/4 inch thick MDF. I intent put a 1/4 inch sheet of hard board on top and trim it out with red oak. This will allow me to replace the top once I finishing abusing it. The bench is 24 inches deep, once trimmed it will be just short of 25 inch.

I will be taking a break from my shop for a couple weeks. Next week Donna and I have a business trip to Fredericksburg, TX and next weekend we will be off to Hawaii, where we will celebrate our 30th anniversary. When I return I will continue work on the drawers and doors, yet another skill of many that I am weak on. It is a good thing I have so many weaknesses, otherwise I be extremely bored.

Monday, August 3, 2009

Inner Walls

Inner Wall

I wanted my man cave to have the appearance of a productive, organized wood shop, I felt this could be done by using hardboard. I put 4x8 pegboard at the top to hang my tools and used solid hard board at the bottom. I put two six inch wide shelves on the walls where I intend to not put a workbench. The top shelf is to be used for display items and the bottom one is to place workstation tools and accessories. The shelf is also where I mounted my dust collection hoses. By limiting the shelf width to 6 inches no additional support is required and still allows room for drills, chargers, adjustment tools and additional attachments. There is still plenty of room for hanging items on the pegboard.

I had several problems with aligning the panels due to the slope of the roof and the cement floor, but isn’t that why they invented trim. It took some tricks to keep the shelves from appearing not level. Now that all the electrical outlets are covered I am able to call the city in to do one last inspection.

Sunday, July 5, 2009

Adding Some Skin

I choose to use a Photo07051933composite materiel 16 foot by 1 foot. Not real difficult to install but a bear to get home. I have a 5 foot bed on my Tacoma and even with the extended attachment in my towing connector I had 5 feet still hanging off the back. It took two trips from the Home Depot using the back roads. I still have some painting to do, mainly on the corner trim and a couple nails to cover. The existing roof has a pitch of about 2 inches but it matches that of the foundation which also has a 2 inch pitch. This allowed the water to run off when the previous owners park their boat under the car port. I put a heat barrier between the studs and the siding. Texas doesn’t stay cold very long but it does stay hot for some time. I having decided to use a swap cooler or a portable AC unit.Photo07051932 

My initial thought was to use a double door but after talking with Rob, I decided to go with sliding door. Like old Norm has on his shop. I wanted to match the shop color and yet blend in with the house. My choice, Red Oak trim with Birch panels and Plexiglas windows. I modified the normal closet sliding door hardware and they seem to be working quite well. The door is only about 3/4 inch thick, but the goal is to keep some of the weather out. If someone want to really get in it wouldn’t take much. The door proved to be a winner with Donna, especially when it is the first thing you see while sitting on the back porch.

Photo07051931 Photo07051932_1

Sunday I spent most of my time installing the dust collection ducting and cleaning the place up. I have a 2 horsepower dust collection system. My plan is to install it in the garage so I can close the door and keep the noise out. My next task is to install the inner walls, 1/4 Panel at the bottom and peg-board at the top. But before that I have to invite the building inspector over to inspect the outside walls and the electrical wiring. Now the work will slow down until next payday.

Saturday, June 6, 2009

The Continuation

After bidding Rob and Lori farewell I continue the work on building the remaining walls. I have all the sticks up now straight and level making Dad proud I’m sure. The unusual characteristics about this build is, the cement slap and roof have a down slope of about 2 inches. which makes the studs look crooked in comparison to the roof. Something I have to get over I guess. Photo05211456The next step was to get my building permit. Most of you may think that you should have a building permit before you begin a project like this but it isn’t really necessary, especially when you forget about it. The inspector forgave my senior moments and approved the building anyways.

Just a Little Help From My Friends

The next victim to assist me in my build was Donna’s dad, Del. A little background first: We went to Del’s family reunion up by Alton Missouri in the Ozark Mountains. Met some real nice folks. Afterwards Del & Arlene follow us back to our home to continue the visit. Donna and Arlene had always heard about Canton, Texas where Texas largest and oldest swap meet or flea market occurs before the weekend of the 1st Monday of the month. I believe it covered about 12 acres. We turn that trip in a camp outing. This was Del and Arlene’s first time in the new camper and it worked well for the four of us. The next test will be for 6 (Sam, Matt Del, Arlene) or maybe not. Again another enjoyable event ended and we came back home.

During the following week Del was getting a little bored especially when he is away from his garden in Englewood, CO. I wanted to make him happy so I talk him into doing a little work on my man cave. Del is a retired electrician, he was able to help me select the correct wire based on my power requirements, along with plugs and junction boxes. And sense I had to work, he kindly volunteered to install these items as well. What professional work! He did it in such a way that a Texan electrician could simply look at the labor install my fuse box and sign off on the work, saving me countless amounts of paid electrical labor and cost.

Photo06061707_1 Photo06061707

Next, I start the outer wall.

The Barn Raisin’

Spring has gone and summer is hitting the streets at least down here in Texas. Lots of things has happen around the house. I invited my brother Rob and his wife Lori to Texas. We wanted to show them how real Americans lived. Ok well maybe we wanted a The Cuctus Boys little more than that. I need to “raise a barn” a term used by the Amish. This is when you invite all the men folk over to do a little work.  I need some smart construction work so what better person to invite but a brother who has received the same training I did from our Dad. My project, though I really wanted to do some major work on the man cave, was to build a fence for my girl friend. All men should know that you can’t be selfish with your time. You need to take care of some of the honey-do requirements, this way it allows you to enjoy the man cave at a later date. This wasn’t just any old fence this was one of them plastic/vinyl/tuber ware kind. Seems a little weak to me but no painting required, just wash it off with the high pressure washer and it looks like new.

This thing look easy but there were some major thinking we had to Photo05211457do. After 3 trips to Lowes and 1 to Home depot and 6 hours of work we got the gate up between the garage and the house. It looks real good. It had to have a strong post in the event someone slams it. After all the lessons learn we were able to knock the to sides out fairly easy. We had a couple issues with putting post plates into the cement. Rob didn’t know this but no matter careful we were about digging the post holes in the yard we still cut a sprinkler wire. I didn’t know this until last week when I had the sprinkler dudes come out and make some repairs. Everything went well and I appreciate Rob’s wisdom and patience with me and the Texas heat.

Photo05211456_1 Photo05211457_1

After completion of the fence we still had a couple hours to work on the man cave. Rob has overhauled his basement and was very familiar putting up studs. He was able to get me started by putting down the frame for the cement and the ceiling.

Saturday, April 25, 2009

Putting up the Sticks

Well it took a little bit of time. With the new house I have a lot of honey do’s requirements, plus the front lawn needs lots of work. Had to work on the sprinkler system and figure out how it works.

Photo04111652

But as you can see by the photo, I have put the some sticks up for the back wall. Since the roofing was held up by 4x4 I decided not to bring them down but instead I framed in between each. The roof is in excellent condition and was installed by professionals, so no reason to make any adjustments. Rob my brother and his wife are coming next week for about 7 days. He is going to help me put up a front fence and also more sticks on the cave. Summer is coming quickly and I would like to get the cave close up. This will allow me to work the inside with my potable AC keeping the place cool. I will be posting quite a bit more in the coming weeks.